You have your drywall flat box and handle all customized to your liking; now what? What should you inspect before you start running your finishing box? What is there to look for and how do you fill your flat box with joint compound so you can begin?
Read on to learn all you need to know about setting up a drywall flat box. You can also check out our featured video from Drywall Nation which provides a complete start-to-finish overview of how to set up a drywall flat box as well as everything you need to look out for before starting your project.
Before getting started, it’s important to make sure that you take the right steps with your drywall flat box so you can maximize your efficiency and work quality
Step 1: Make Sure Your Flat Box is Clean
The first thing you want to do before getting started is to visually inspect your mud box and make sure you did a really good job of cleaning it the last time you used it. Cleaning your automatic taping tools at the end of every work day will help you get started that much faster on the following job.
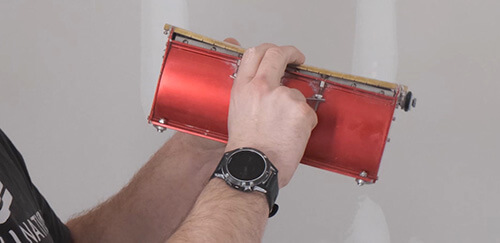
Next up, you want to inspect your trowel bar and ensure that your trowel bar is nice and concave. Make sure there’s no dried up mud or chunks of material underneath the bar itself.
When inspecting your trowel bar, a lot of movement and flex is a good sign! This flexibility alongside crown dial adjustments is what gives you a nice even crown along your wall or ceiling joint.
 ” data-w-id=”c9b2ba26-4677-2938-eb1a-b472f42d7307″ ]=””>
Step 2: Inspect and Adjust Your Flat Box Blade
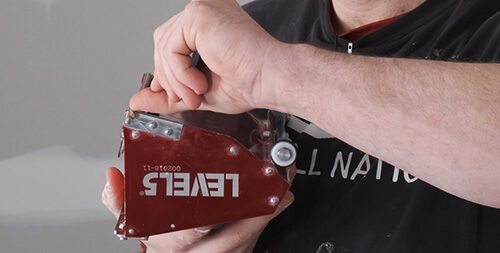
The second thing you want to inspect is the actual height of your drywall flat box blade. You want to make sure you have at least a fingernail width of blade along the back. That blade is what’s going to ensure that your seams are feathered nice and smoothly along the top and bottom edge.
If you don’t have at least a fingernail width of blade you could use a screwdriver and turn the little set screw underneath – that’s going to raise your blade.
 ” data-w-id=”09fd0e54-86c4-a431-cf50-ff4d1fe0c9a6″ ]=””>
Step 3: Pump Your Flat Box Full of Joint Compound
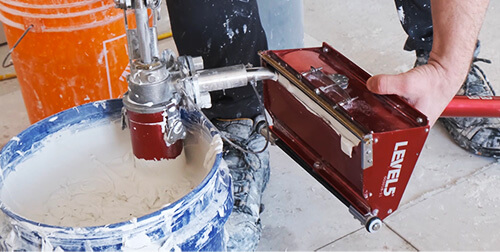
To pump joint compound into your flat box, you’re going to start by submersing your pump directly into our mud contained within your bucket. First, prime your pump to make sure there’s no water, air or anything else hiding in the mechanisms.
Next, insert the filler nozzle attached to your pump into the ‘mouth’ of your flat box. As you begin pumping compound into the box’s mouth, slide the box back and forth to make sure you get a nice even fill. You will be able to see as the box slowly fill with joint compound – it will begin to seep out of the mouth opening. You flat box is now prepped with joint compound!
 ” data-w-id=”a415eb99-1718-73de-328f-72053a400aeb” ]=””>
Final Thoughts
You’re now good to go! If you’re still looking into which drywall taping tools are best for you, be sure to check out LEVEL5’s selection of drywall flat box sets – these are the most cost effective option for drywall finishers who would like to make the transition from hand finishing to automatic taping tools.
Have questions? Give us a call at 800.227.7713 or send us an email at info@level5tools.com.