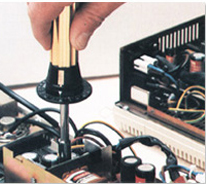
Once a torque specification is determined, the joint should be audited to verify the product has been fastened to the proper torque value. It is important to audit the joint for accuracy and to ensure your product’s quality, safety and reliability isn’t compromised. The failure of a three-cent fastener that isn’t properly tightened can lead to catastrophic or latent failures. Fasteners that are insufficiently torqued can vibrate loose and excessive torque can strip threaded fasteners. It is important for many companies to ensure that proper torque is being applied and maintain requirements associated with the ISO 9001 quality standard.
Traditionally there are there three main test methods to verify the torque specification. These include first movement in the fastening direction, first movement in loosening direction (breakaway) and determining the rotation angle by marking the fastener; loosening it and determining the torque required to move the fastener back to the original position. While these methods can achieve the intended purpose they have drawbacks.
1. First Movement Torque Test
Once the fastener has been tightened, employ the use of torque measuring tool. Mark the tightened fastener and surrounding application. In the tightening direction, begin to slowly apply force to the tool until the first movement in the fastener is noted. The reading recorded is a good indication of the original torque applied to the joint. This is the best way to determine residual torque.
2. Loosening Torque Test
This is a similar process to the first movement test described above, except instead of the tightening the fastener, the torque is applied in the direction that loosens the fastener. At the point the fastener breaks loose, the torque reading is recorded. The torque value to loosen the fastener is the approximate torque that was applied to the joint.
3. Marking Torque Test
Once the fastener tightened, mark clearly the surface of the fastener, nut or bolt and continuing the mark onto the surface being clamped for reference. This time loosen the fastener and retighten until the marks on both application and fastener are aligned. The torque required to return the fastener to its original location is the reference to the original torque applied to the fastener.
What is Residual Torque?
It is the amount of tension that remains in a joint after fastening a threaded fastener.
Torque Auditing
As part of the overall quality control process, manufactures should include a “Torque Auditing” program. By verifying the torque after the assembly process, you not only verify adequate torque was delivered to the fastener, but may also detect missed or loose fasteners, or joint relaxation. But since the fastener is already seated and friction during rundown is different from the friction in a static joint, the torque reading will vary from those in the tool crib and from the dynamic values. These differences will need to be accounted for when engineering a residual torque specification. Torque auditing validates the fastening process, the torque tool, the product design and the materials used for the application.
Equipment that can be used for measuring torque with these test methods would be:
- Dial Screwdrivers or Dial Wrenches
- Digital Torque Wrenches
- Torque Testers & Torque Sensors
Torque auditing and measuring torque should occur in three facets of the assembly process: 1) Prior
to Assembly 2) During Assembly 3) After Assembly. Testing torque is literally a science and not something that can be left to chance.
Using a quality torque testing process makes a safer world through accuracy and precision. With 50 years of experience, Mountz is a pioneer in developing torque testers and torque sensors. Chat with a torque expert. Have a Mountz representative visit your facility and provide a torque testing demonstration. Request an appointment today.