Home Improvement Projects You Can Do with Reclaimed Wood
(function(d){
var f = d.getElementsByTagName(‘SCRIPT’)[0], p = d.createElement(‘SCRIPT’);
p.type = ‘text/javascript’;
p.async = true;
p.src = ‘//assets.pinterest.com/js/pinit.js’;
p.setAttribute(‘data-pin-hover’, true);
f.parentNode.insertBefore(p, f);
}(document));
function openWin() {
myWindow = window.open(“http://www.youtube.com/channel/UCHGLUxlObWaCOcDTYiuZFPA?sub_confirmation=1”, “0, 0”, “width=575, height=325”); // Opens a new window
AnalyticsTrackEvent(‘Social’, ‘Subscribe’, ‘YouTube’);
}
It’s fairly common for homeowners to undertake some sort of renovation or
demolition over the summer months. But then, that leaves the issue of dealing
with all the leftover scrap wood and lumber.
You can get rid of it by offering it for free online or by paying to have it
taken to the dump, but in the interest of protecting the environment and preserving
rustic style, why not reuse it in your home (indoors or outdoors) to create something unique?
Here are six home improvement projects you can easily do using reclaimed wood
and basic household tools.
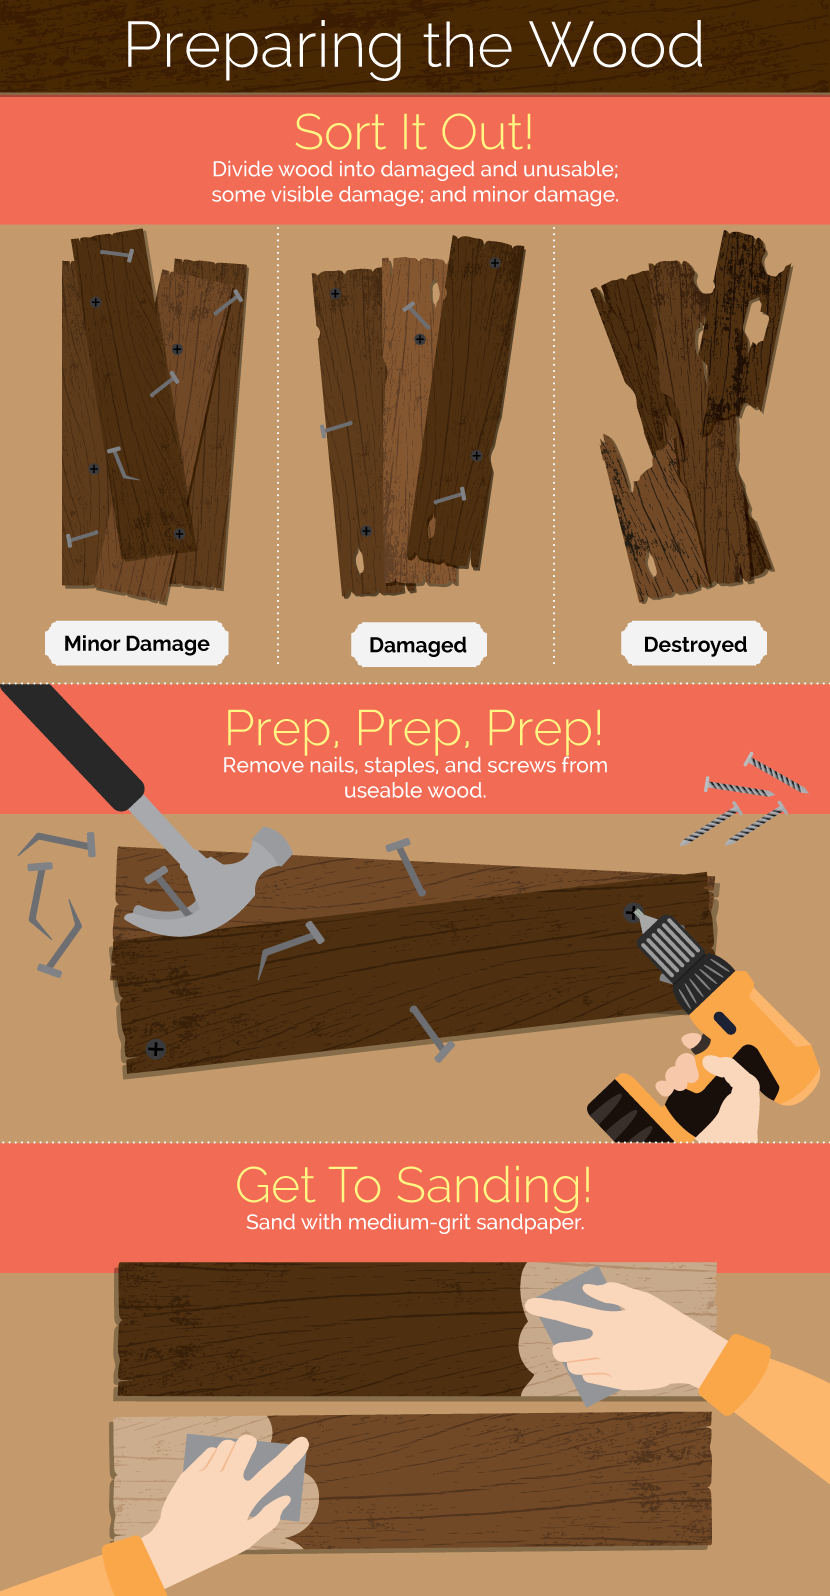
Prepare Your Wood
The difference between simple scrap wood and the much more desirable reclaimed
wood is in the preparation and treatment. So, before you attempt any sort of project
using yard or garden cast-offs, make sure that you’ve done your prep work. First,
you’ll want to sort your wood into piles: totally damaged and unusable, some visible
damage, and minor damage.
You’ll probably want to bundle the totally damaged pieces and leave them for garbage
pick-up or use them for campfire kindling. But the remaining two piles should be salvageable.
Cut down any damaged ends or giant splinters. From there, pull out nails, staples, screws, or
anything else that could impale you. Now all that’s left to do is clean the wood with a
damp rag and some basic cleaning solution and, if necessary, give your boards a quick
sand with some medium-grit (80–120 grit) sandpaper.
Now you’re ready to start to create something brand new!
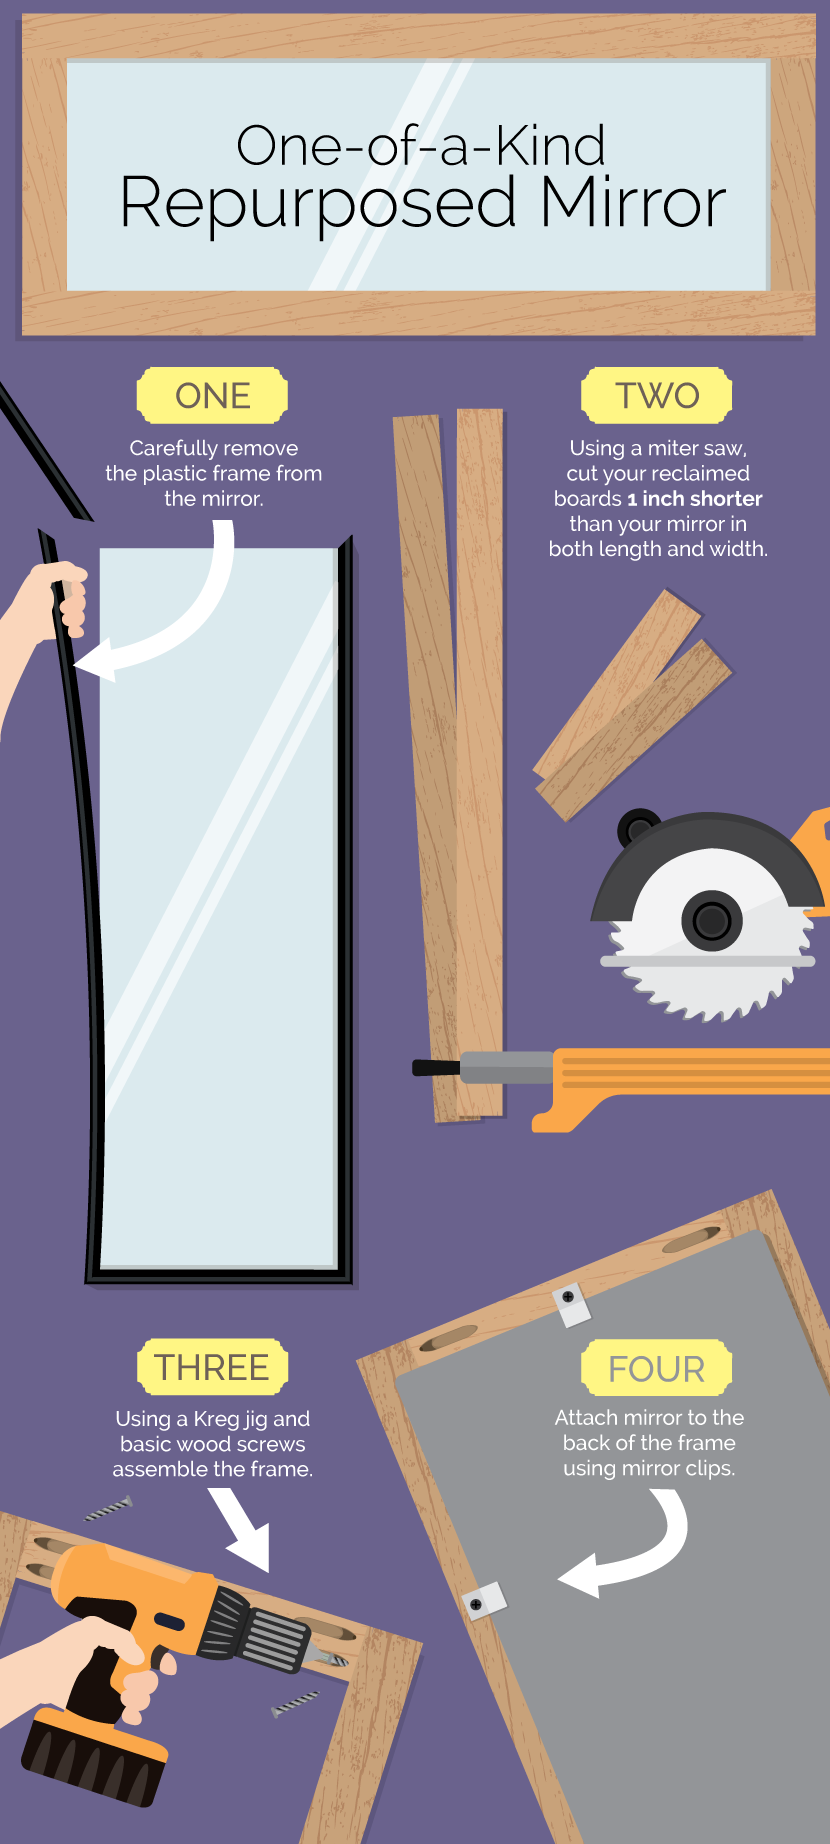
Make a One-of-a-Kind Mirror
Have you ever seen those giant leaning mirrors in high-end decor stores? You know,
the ones that have the big chunky wooden frames? Use your reclaimed fence or deck boards
to create one of your own for a fraction of the cost.
Find a basic full-length mirror. You can buy these at your local big box or
hardware store for less than $15. Pull off the plastic frame and measure the actual
mirror. Cut your reclaimed boards using a miter saw so that the inside edges are all
an inch shorter than your mirror.
Using a Kreg jig and basic wood screws, assemble your mitered reclaimed frame.
Then place your mirror, centered on the backside of your frame,
and clip it in with mirror clips. Add some basic hanging hardware if
you like, or simply lean it against a wall – just like in the high-end
stores. Smile, because you’ve just saved yourself hundreds of dollars!
Create an Indoor or Outdoor Tabletop
Want to give your existing patio set or table some reclaimed rustic zeal?
This project is fairly simple, provided you have an ample supply of scrap lumber.
Purchase a thin piece of construction-grade plywood and cut it down to the dimensions
of your tabletop (or you can have them do this for you at the hardware store.)
Next, cut the reclaimed boards to the length of your table. Attach them to the
plywood using construction grade adhesive and finishing nails. Clamp them in
place and leave them to dry for a few hours.
Then, using adhesive and clamps, attach the plywood to the top of your old table.
Sand down the edges of your wood and the top of your (new!) table with an orbital
or palm sander. Seal with at least four to five coats of polyurethane, especially
if this table will be exposed to the elements.
Build a Rustic Family Drop Zone
Sometimes, we don’t have enough scrap or reclaimed wood to build a
new tabletop or similar larger project. But even if you only have one
or two pieces of wood, you can still use them! Pick up some drawer knobs
(mismatched is better!) and stick them to your reclaimed board.
Add basic hangers on the back and hang it up near the front door
for book bags, purses and dog leashes. If you’re really crafty,
use some watered down acrylic paint and a stencil to add a welcome
message above your knobs.
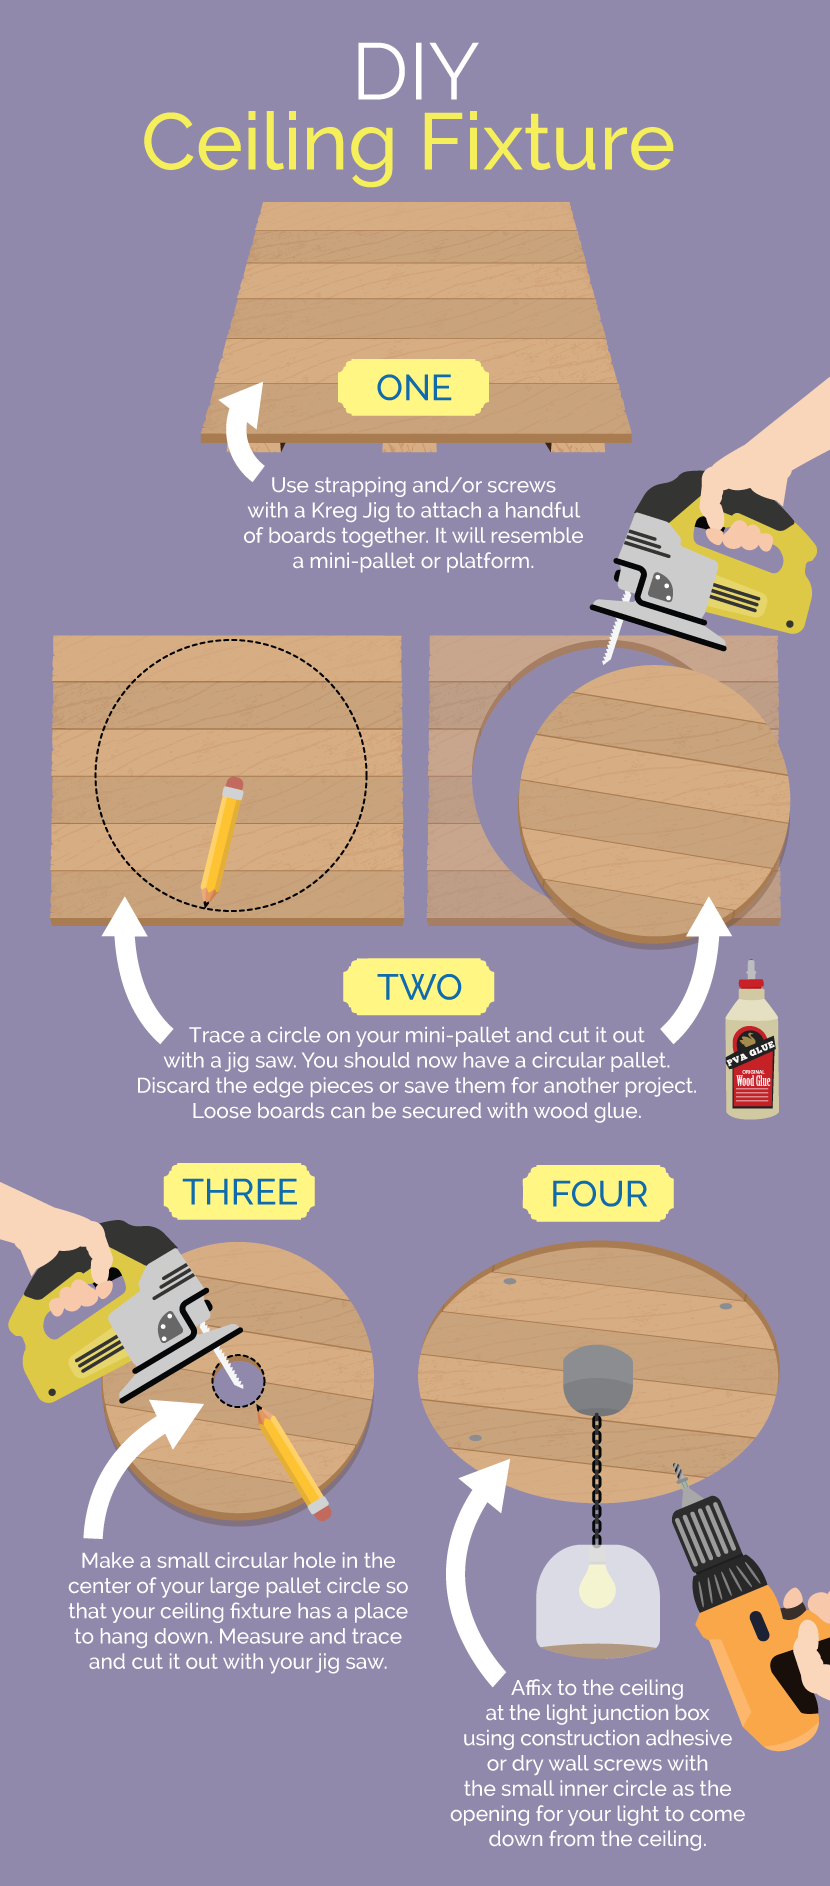
Add Interest to a Plain Ceiling Fixture
Many of us have a plain hanging fixture in our dining room or master bedroom.
If you have a half dozen boards or so, line them up and attach them using either a
Kreg Jig or a couple of pieces of basic strapping. Once your boards are secure,
they’ll resemble a mini pallet or fence. Next, trace a large circle on them and
cut it out with a jigsaw.
Use wood glue and your clamps to re-attach any pieces to keep your circle complete.
Then measure and cut another, smaller circle in the center of your new circle.
This will be where your light will go!
Take down your light fixture and then place your new “rustic medallion” on
the ceiling using construction adhesive and/or drywall screws. (You should be
able to find a couple of studs by following the support for the junction box.)
Now re-hang the light fixture and smile at your rustic and charming ways!
Plank a Wall
One of the most simple and effective ways to use leftover wood is to
just plank a wall. If you don’t have enough reclaimed boards, you can
supplement with new lumber stained either to match or complement the
tones in your scrap boards.
Lay your boards parallel to the floor (and ceiling if that’s applicable),
and then nail them into the wall using a nail gun, making sure to hit the studs.
Offset your boards so the cuts don’t line up, much the same way you’d lay a hardwood floor.
If you’re indoors, you can just leave the wall as is, or fill the nail
holes and prime and paint the planks for a beach-worn feel. If your plank
wall is outdoors, use some outdoor sealant and/or repellant to ensure
your reclaimed wood wall stays looking rustic and not moldy or derelict!
Ramp up Your Rustic Storage
Lastly, if you only have a few pieces of reclaimed wood, use some basic
wooden shelving brackets purchased at the hardware store to build your own
rustic indoor shelving. Use wood screws to attach the reclaimed boards to
the brackets and drywall screws and anchors to hang the brackets on the walls.
Hang these low to create a bedside drop zone, or from floor to ceiling in a
living or media room to create a unique (and eco-friendly!) focal wall with
capability for plenty of storage.
This is just a taste of what you can achieve with bits and pieces
found either in your own yard or the yard of a friend. And, trust us,
once you start working with reclaimed wood, you’ll be hooked!

(function(d){
var f = d.getElementsByTagName(‘SCRIPT’)[0], p = d.createElement(‘SCRIPT’);
p.type = ‘text/javascript’;
p.async = true;
p.src = ‘//assets.pinterest.com/js/pinit.js’;
p.setAttribute(‘data-pin-hover’, true);
f.parentNode.insertBefore(p, f);
}(document));
function openWin() {
myWindow = window.open(“http://www.youtube.com/channel/UCHGLUxlObWaCOcDTYiuZFPA?sub_confirmation=1”, “0, 0”, “width=575, height=325”); // Opens a new window
AnalyticsTrackEvent(‘Social’, ‘Subscribe’, ‘YouTube’);
}