In this project tutorial we’ll be making a miter sled, which will be dedicated to cutting 45 degree angle cuts, ideal for trim work, picture frames, wall decor, and many other projects.
This is a sled for your table saw and it’s made with a 1/2″ plywood base (although that can be done in 3/4″), the miter fences are 1-1/2″ plywood (two 3/4″ pieces laminated), and the blade block and front fence are made from standard dimensional 2×6 construction grade lumber.
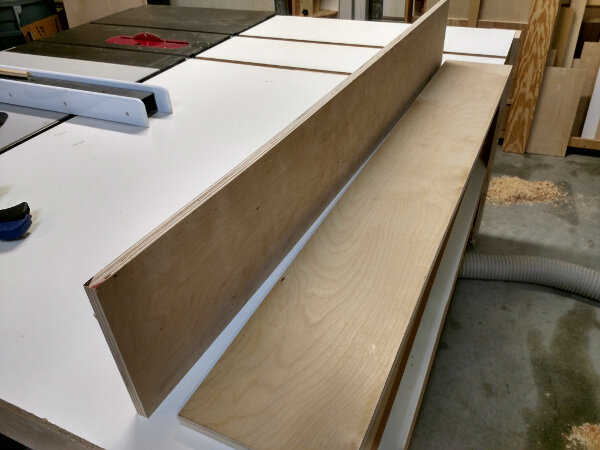
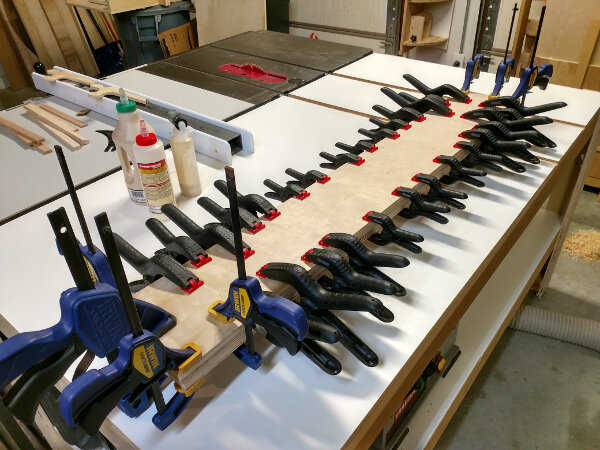
Step 1 – Glue Up The Fence
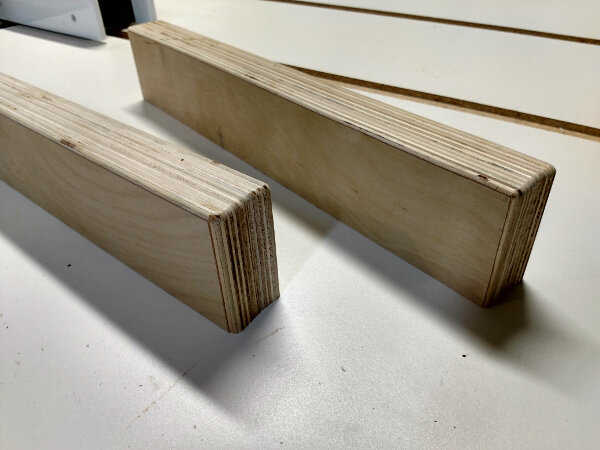
First you’ll want to take some 3/4″ plywood and laminate 2 pieces together, to create some 1-1/2″ fence stock.
Ultimately the size of your miter sled fences will be 2-1/4″ by 14″.
But this first glue up can be larger, and you’ll have fence stock made up then for other sleds.
Just cover one piece of plywood with wood glue and clamp the pieces together.
Ideally this should be really flat plywood. If it has a bow, you can try to flatten it by gluing the pieces so the bow in each board is opposite the other.
Then when glued, the opposing bows might flatten the laminated fence stock. That’s what I did here to deal with the bow these pieces had. It worked out really well, the final fence stock is really flat.
Step 2 – The Miter Sled Base
This is just a square piece of 1/2″ plywood, cut 20″ by 20″.
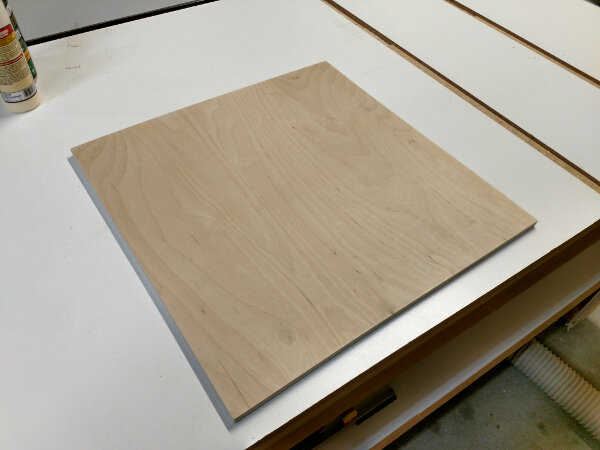
Go ahead and sand it smooth at this point, and sand the edges and corners as well.
Plywood has a tendancy to give splinters if you don’t sand along the edge and corners really good.
Step 3 – The Miter Sled Runner
Build yourself a hardwood runner to attach to the bottom.
This is done with some 3/4″ hardwood stock and a thin-rip jig.
Thin rip the runner from the 3/4″ stock, and lay it on it’s side for cutting the width.
Then you’ll shave just a hair off the runner until it fits just right in your miter slot.
Click here to see the entire process of making hardwood runners.
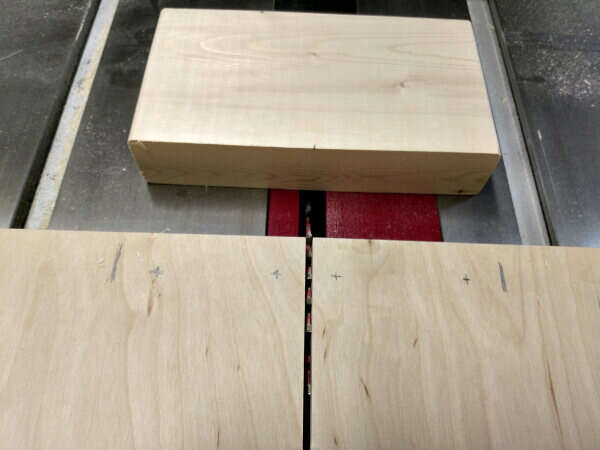
To attach the runner, first square up your base on the table saw, with the blade lined up in the center.
Draw marks on the front edge and back edge, indicating the location of the right miter slot.
Flip the base over and extend the lines across the bottom.
Countersink 3 or 4 holes in the runner and attach to the bottom of the base using 3/4″, #6 wood screws.
If it rides smooth at this point, and it should if you made your runner correctly, then you don’t need to add the second runner for a sled this small.
If later on your miter sled develops slop and fits kind of loose, you can either add a second runner for the other miter slot, or replace the one you just screwed on.
Step 4 – Prep The Miter Fences
Now your fence stock should be ready.
Cut out the 2 fences for the next step. They’ll be 14″ by 2-1/4″.
You might need to make them less the 2-1/4″, depending on how high your table saw blade can be raised.
The blade will need to cut through this fence, and the base at the same time. For this step that means your blade will need to raise up about 3″, to clear the fence.
Now round over the top and back edges using a 1/4″ or 1/8″ roundover bit at your router table.
If you’re not set up for this you can just round over the edges a bit with a sanding block.
Go ahead and sand these pieces down really good at this point, just the sides, back and top surfaces.
Step 5 – Attach The Fences To The Miter Sled
Now back over at your sled base, mark a line down the center where the blade will travel.
Then holding a speed square at the back, line up the first fence piece so the front corner touches the center line, and the back of the fence slightly runs off the back corner of the base.
Outline the fence with a pencil on to the base.
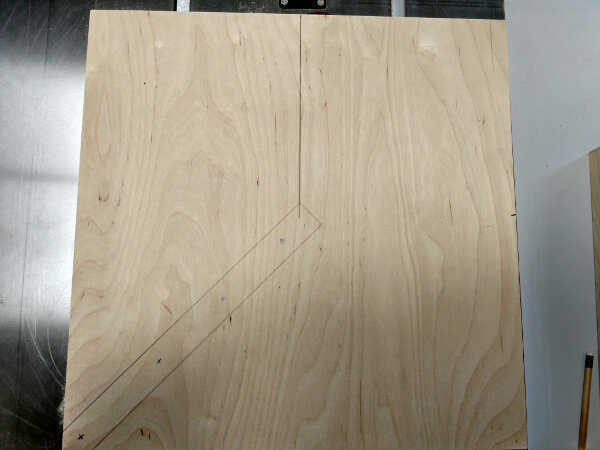
Mark out and drill 4 small holes, just to indicate exact hole locations on the other side.
Note > Be careful not to get any screws too close to the blade line. You may want to stay about 1″ from the blade.
Then from underneath, drill and countersink clearance holes for some 1-1/2″ or 2″ construction screws.
Clamp the fence in place, and then drilling through your clearance holes, create pilot holes in your fence.
Then attach with the construction screws, making sure the fence stays clamped in place.
Caution: These long construction screws can easily make the plys of the fence split near the ends. The pilot holes you drilled should eliminate that risk.
I didn’t do this the first go around, and I ended up splitting the end of the fence apart right on the glue line. To fix that, I put more glue in the gap, removed the screw, then clamped together. After 45 minutes and with the fence still clamped, I ran screws in from underneath, beside the glue seam, not directly in it.
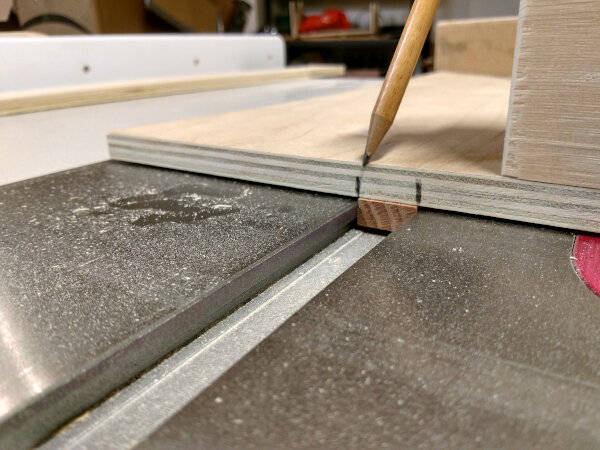
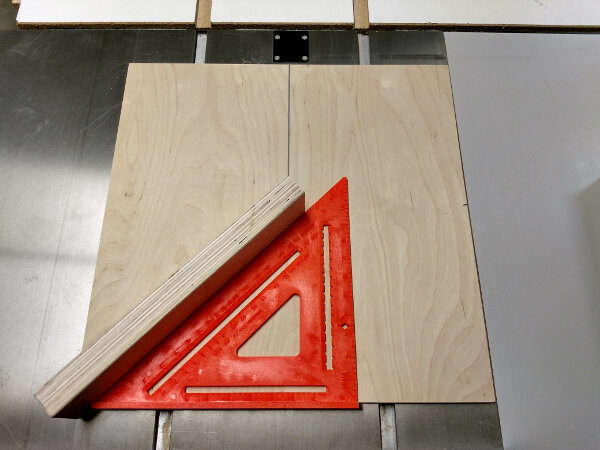
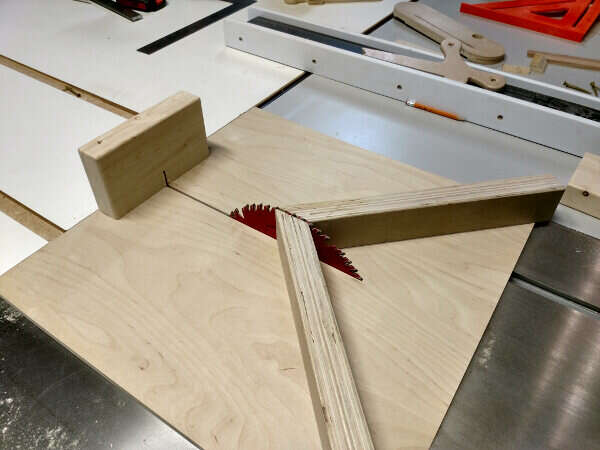
Now run your sled through the table saw to cut the kerf and cut off the front corner of the fence.
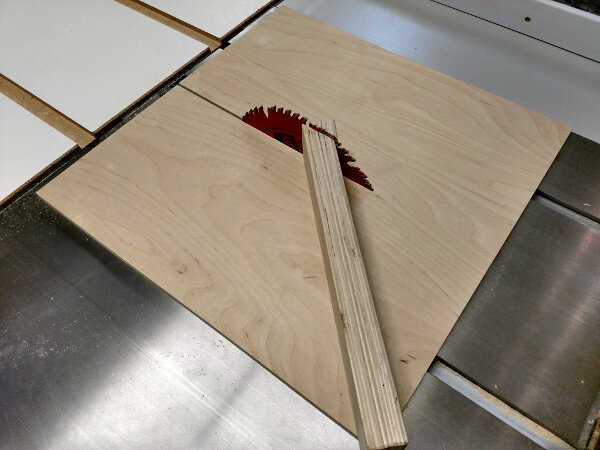
Then you’ll take the second fence piece and cut off the front corner using your miter saw.
Alternatively, you can flip it upside down and cut it on your table saw, using the fence and sled you just made. Use clamps to hold the second fence to the first fence for this cut. WATCH THE BLADE, DON’T LOSE A THUMB!
Note > This is just a rough cut, so precision is not needed. You’ll trim off the final miter angle in a few minutes.
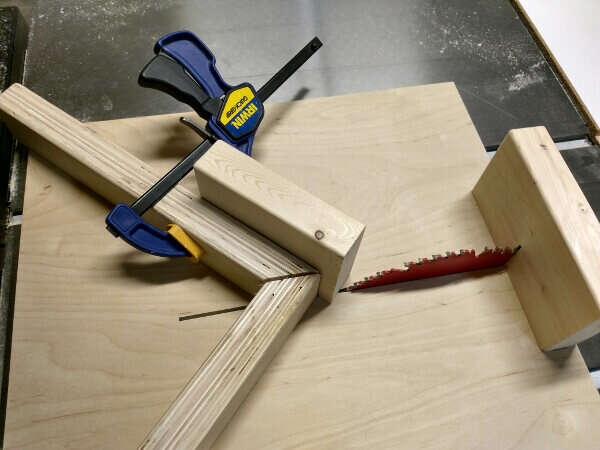
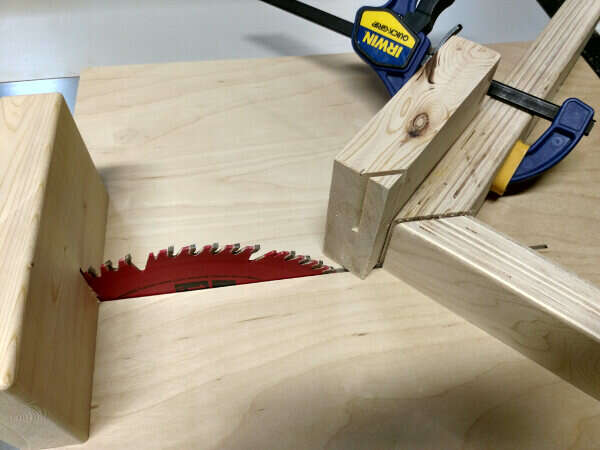
Next you’ll use a framing square to line up the second fence piece.
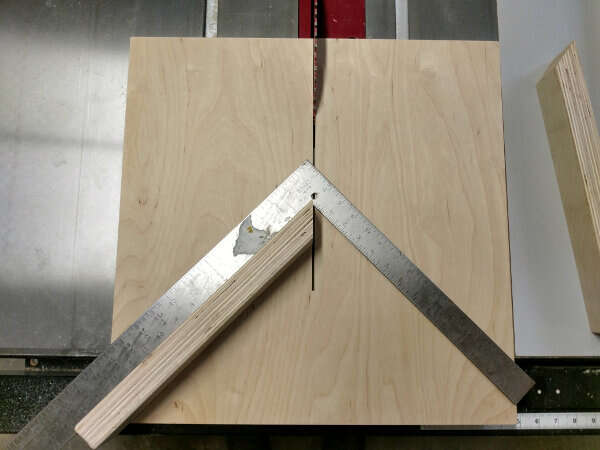
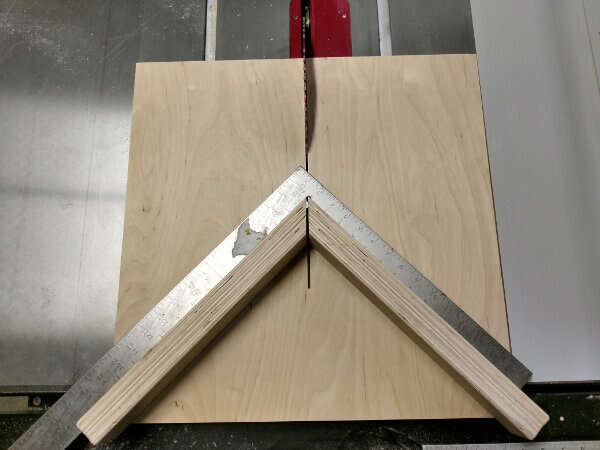
Slide the right fence in just enough so it hangs over the kerf cut you already made.
Doing it this way means it doesn’t matter if the first piece was perfectly at 45 degrees. What matters is the the second piece is a perfect 90 degrees from the first piece. So when you make your miter cuts, you’ll always cut from each side of this sled to make 2 adjoining pieces. I’ll link to a page with these directions at the end of this article.
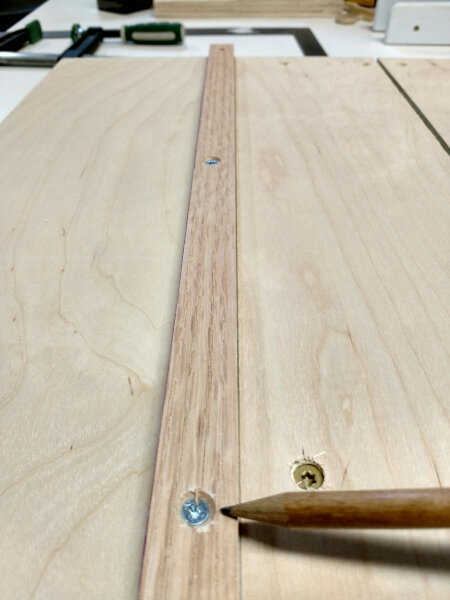
Now outline the second fence on to your miter sled base, and repeat the clearance-hole process from before.
After you’ve drilled the holes and are ready to clamp the right fence on to attach it, use the framing square again to make sure it’s a perfect 90. Don’t just eyeball it to the marks you made.
Step 6 – Front Fence and Blade Block
The front fence is just a scrap block of wood in my case. I’m using a piece of a 2 by 6 dimensional lumber from Lowes, cut to 7″.
If you make it short like this, then later on when you’re cutting a miter, the sled can support longer boards that need to hang off the front end.
If you had made this front fence the width of the entire sled, at some point you’ll set a piece down to cut and realize it’s too long and hits the front fence.
Some people build a sled like this without a front fence. I prefer the front fence as it makes the base more stable and solid. You’ll notice without the front fence on, the whole sled feels kind of flimsy.
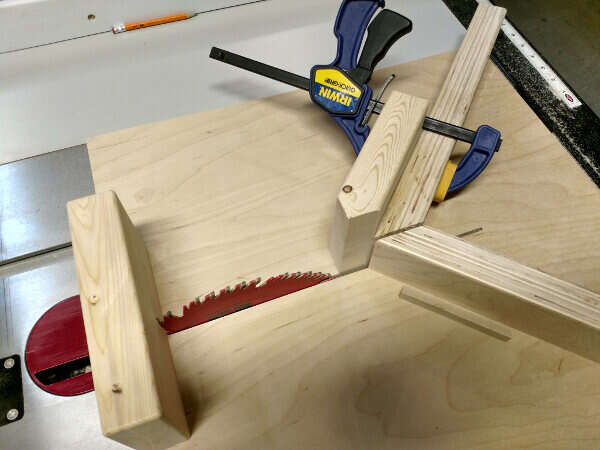
Attach the fence with construction screws, keeping them at least a 1/2″ from the kerf.
Go ahead and make a kerf cut through the fence, and then run it on through to clean up the second miter fence you already attached.
BE CAREFUL, THE BLADE WILL CUT OFF BOTH OF YOUR THUMBS IF YOU DON’T PAY ATTENTION! NOTICE WHERE THE BLADE ENDS UP AT THIS STAGE:
YOU SEE ANY BLOOD?… NO?… THAT’S BECAUSE I PAID ATTENTION!
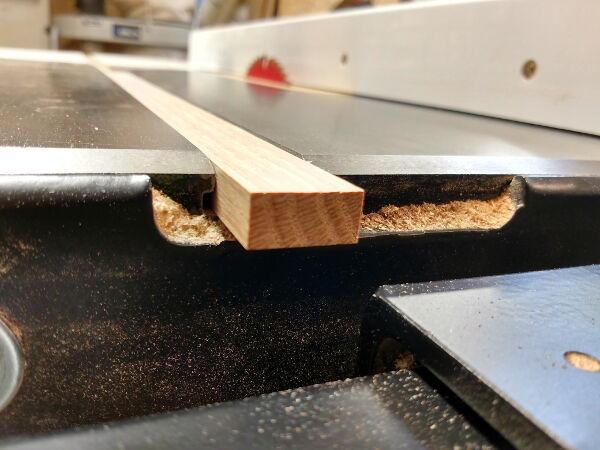
Now take another block of 2×6 scrap wood, rip it down to about 4″ wide and make it 6″ long.
Round over the top and back edges and corners.
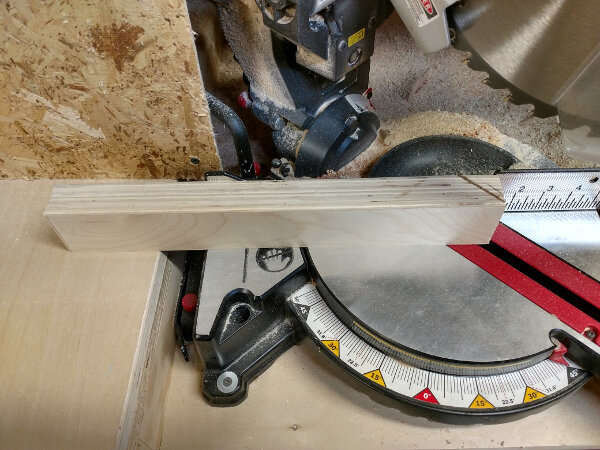
Miter one end to a point by cutting a 45 from both directions.
If you use your miter saw, cut this 45 degree point BEFORE you crosscut down to 6 inches. It’s much safer to make this cut with a longer board.
You can also use the sled you’re building, but you’ll need to flip the piece over (and cut twice) since it’s taller than what the blade will cut.
The Blade Block is there for safety, and it gives a place for the blade to be buried when passing through a cut.
This way you won’t cut off your thumbs the first time you use this sled!
The block is attached only using glue. It can be glued to the base, and to the inside of the miter fences.
Apply glue and set weights on it, let it set for 45 minutes.

At this point it’s ready for use.
However, I would suggest taking this one step further.
A miter sled like this tends to allow slippage of the work piece. The blade pushing into the wood at an angle, makes it want to slide back.
Even a slight bit of movement during a cut in this manner can ruin your miter edge.
So cut strips of sandpaper, 120 grit works fine, and glue them to each fence.

Now when you hold the work piece against the fence, it will be much more secure and not want to slip.
Up Next > Learn to cut perfect miters here. I show you how to use a miter sled like this, along with a few other methods for cuttting miters.