Burning wood. Slow, difficult cuts. Dulling blade. All bad things.
This is what happens more and more, the dirtier your table saw blade becomes.
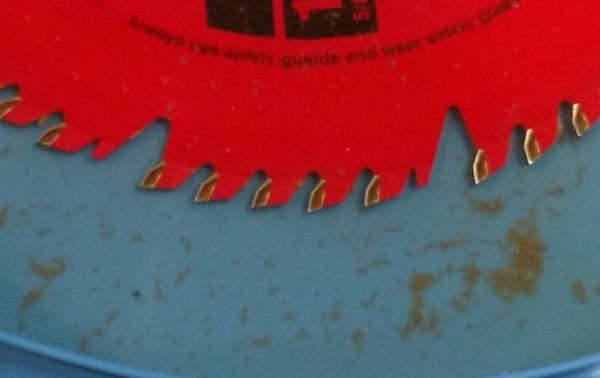
The carbide tips on your blade will get packed with pitch and resin from the wood you cut, some wood types are worse than others.
So after a couple projects, it’s a good idea to spend 20 minutes cleaning your blade to make it shine like new.

I’m going to show you exactly what I do to make this:
Look like this:
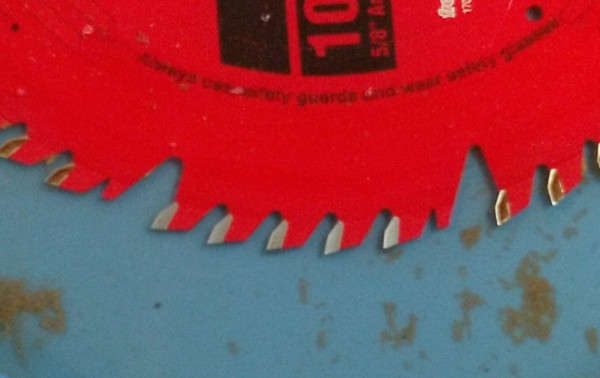
In a quick and simple process.
So if you’ve got build-up on your carbide tips, follow these steps for a quick, hassle-free cleaning process for a blade that cuts like new.
Stuff You Need
I strongly suggest getting this cleaning kit from Amazon. It’s got everything listed below (minus the weight), and it works great. It’s pretty cheap too.
Flat Bottomed Pan or Tub, Plastic
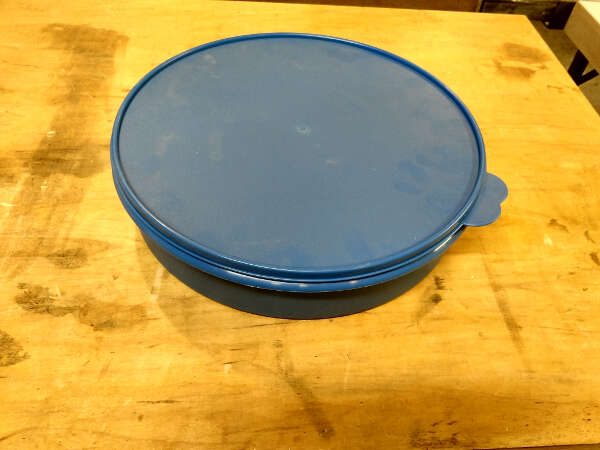
I use the blade cleaning pan I got from Amazon. It’s perfect, it has a lid, and a ring on the bottom to elevate the blade just enough to keep the carbide tips off the bottom.
Pitch and Resin Remover
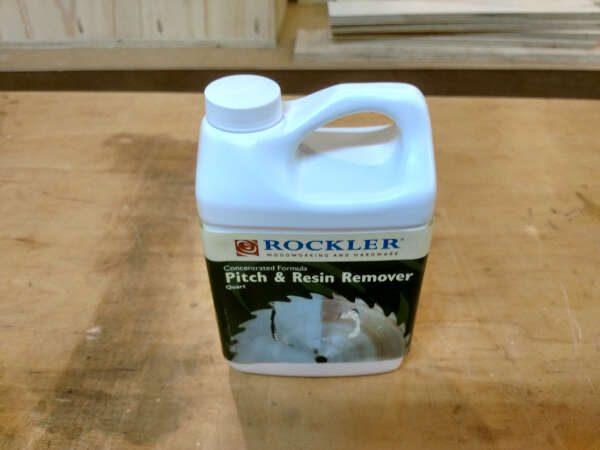
This stuff works really great, and I just leave it in the pan for several uses, so it lasts a long time. A cheaper alternative I’ve read about (though I’ve never tested) is just using warm water with dish soap.
Some people suggest using simple green or other household chemicals. I would advise against this. It’s been posted on various forums that some of these chemicals can degrade types of metal in your blades and bits. This could diminish the integrity of the blade or bits, making them susceptible to breaking or failing somehow.
Soft-Bristled Brass Brush
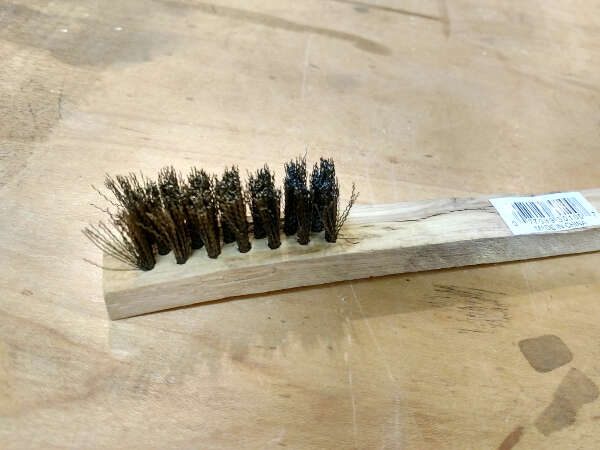
You shouldn’t have any problems scratching or dulling the carbide using this type of brush.
Hot-Wheels Deep Cycle Battery
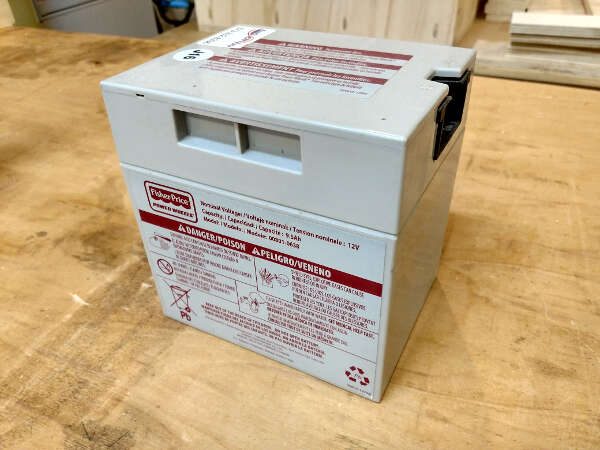
This is optional. You’ll use it to make an electrically induced wood-pitch torture and removal device…
…
…
-Really?-
No, not at all. That was a joke.
But it does make for a fantastic weight.
I use it to keep the blade firmly in place and submerged, while cleaning the sides of the carbide tips.
The Process
Assuming you’re using the kit I suggested above, you’ll likely find that there is a flaw in their design.
The bottom of the pan is concave, and unless you put quite a bit of the liquid cleaner in the pan, you have to push the blade down to fully submerge it.
So that’s one reason I use the weight, in combination with the included bit-cleaning plastic jar that came with the kit. It holds the battery up out of the cleaner (see below).
Anyway, let’s get started.
Step 1 – Set It Up and Let Soak
Pour the cleaner directly in the pan. Do not dillute it. This stuff works better using it at full strength.
Set your blade, fully submerged, centered in the pan. Using the bit-cleaning jar and a weight, push the blade down to flatten the bottom of the pan.
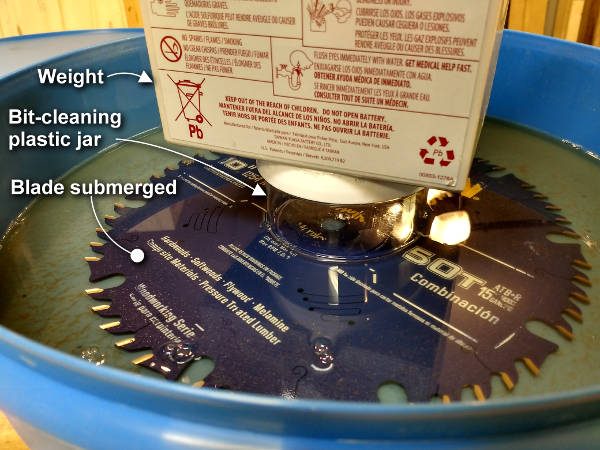
Even if you’re using a pan that has a good flat bottom, I would still use the weight. It holds the blade firmly in place while you brush away the build-up.
Let it soak like this for 10 to 15 minutes, depending on how thick the build-up is. I usually let it soak 10 minutes, with great results.
Step 2 – Clean the Sides
With the blade submerged, and the weight still in place, use the soft-bristled brass brush and scrub off the sides of the carbide tips, and around them if needed.
You should only make contact and scrub so the brush is running away from the sharp edge of the tips, not against it.
Flip it over and repeat on the other side.
See the video for illustration:
Step 3 – Clean the Fronts and Backs of each tip
Remove the weight and hold the blade upright in the pan.
Continuing to only brush away from the sharp edge, clean off the build-up on the back surface of each tip.
Then the final step is more tedious. You’ll need to lightly (very lightly) brush the face of each carbide tip, individually.
If it has soaked long enough, the build-up should come off very easily, so there should be no ‘scrubbing’ required. Just a few passes should clear off the surface.
Here’s an illustration of this part:
Clean up
I usually submerge the blade one more time to clear off any remaining loose residue.
You may want to rinse the blade with water to remove all the cleaner.
Then wipe it dry with paper towels.
If you have an air compressor, use that to finish drying it. If not, a blow-dryer works fine.
Lightly rub some oil on the blade to keep any exposed metal areas from rusting.
I use a Freud blade which is painted red, and an Irwin Marples blade that is blue. You don’t need to worry about oiling a blade like this if it’s still got good paint coverage.
But over time, there may be areas with exposed metal I’ll rub some oil on after cleaning and drying.
Click Here for the cleaning kit I use.
Be sure to sign up below and I’ll send you updates on when I post more articles like this, and send you free tips and plans from time to time.